Hello everyone,
Pooja here today to share with you my creation.
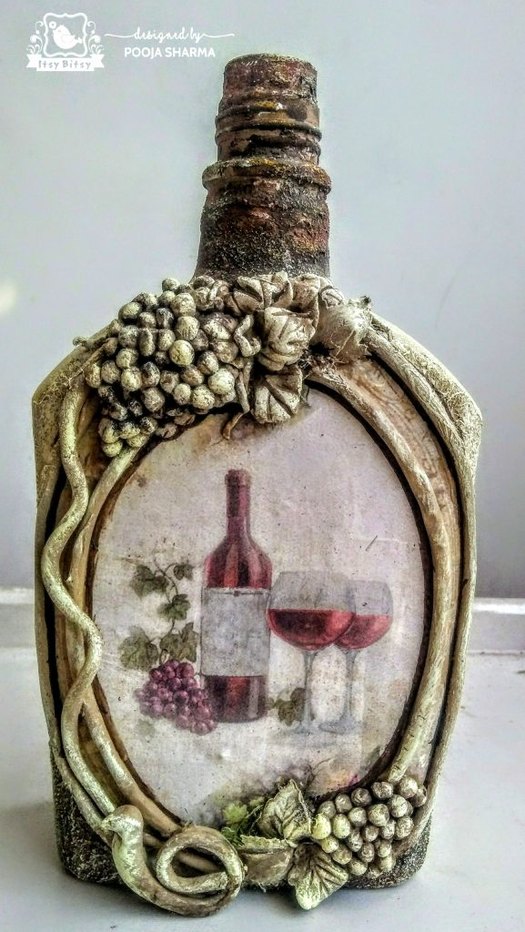
It’s a decoupage bottle I will be making today and I hope you find it interesting and inspiring and try it out!
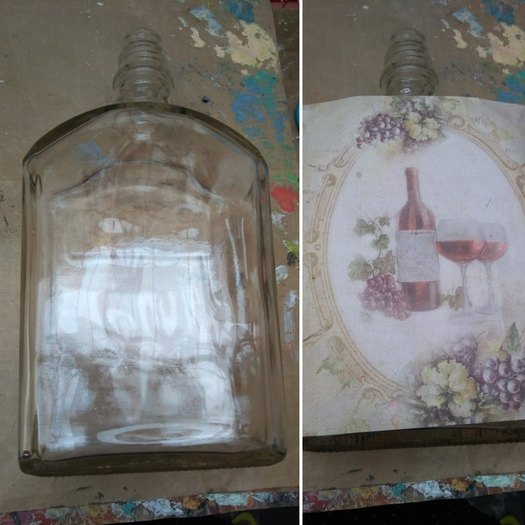
When I got these new decoupage papers from Little Birdie, I liked the vintage look so much that I immediately decided to try out something with a classy, vintage appeal.
Have a look how I made it….
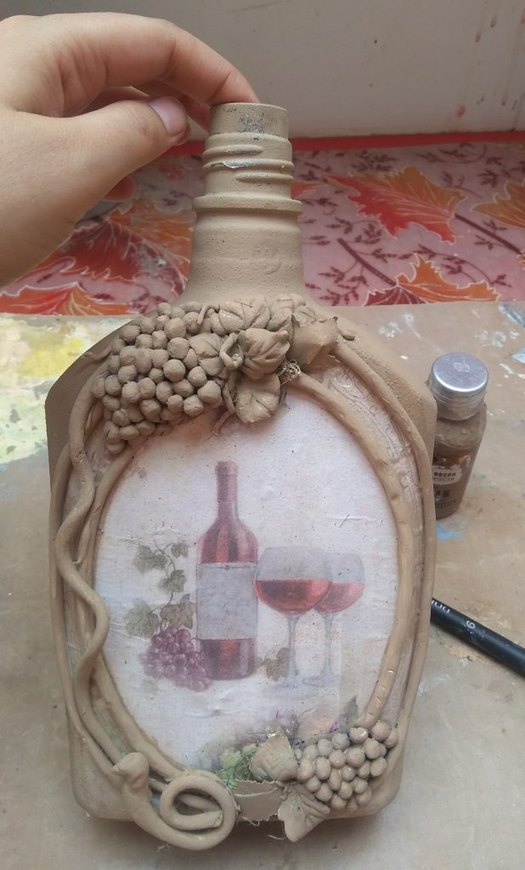
First of all I cleaned a bottle. I wanted to use only the design at the center, so I cutout the extra paper
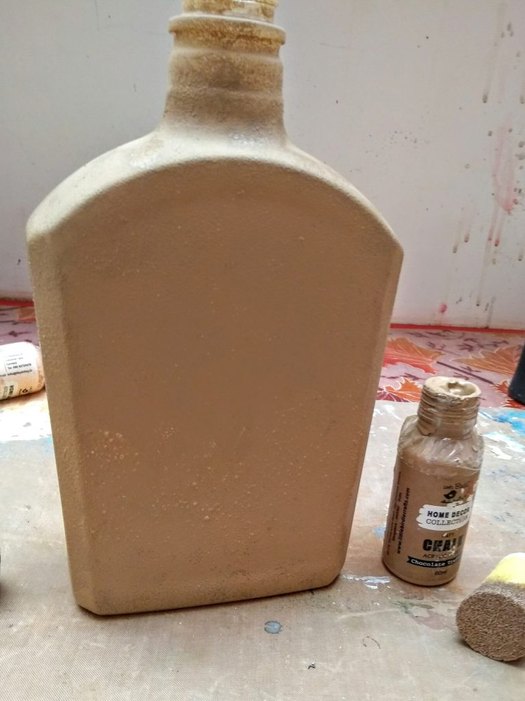
2. Now I colored it with Chocolate Truffle shade of Chalk Paint.
 3. I pasted my decoupage paper with Little Birdie Decoupage Glue- Glossy also applied the same glue on top of the decoupage paper to seal it.
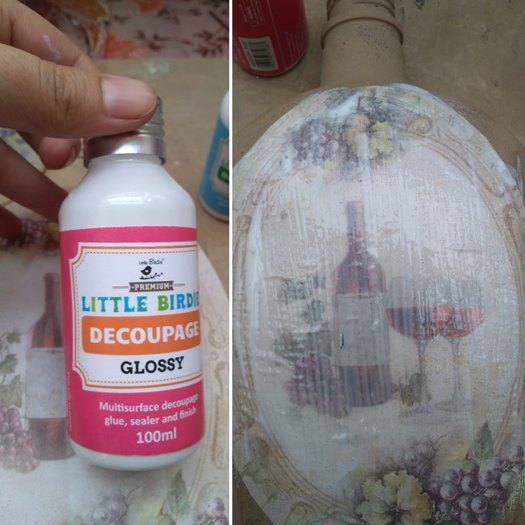
4. Thereafter, dried it and did some clay work on the bottle for added interest.
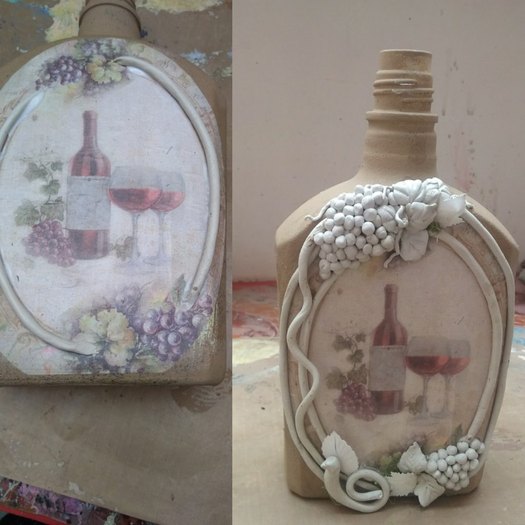
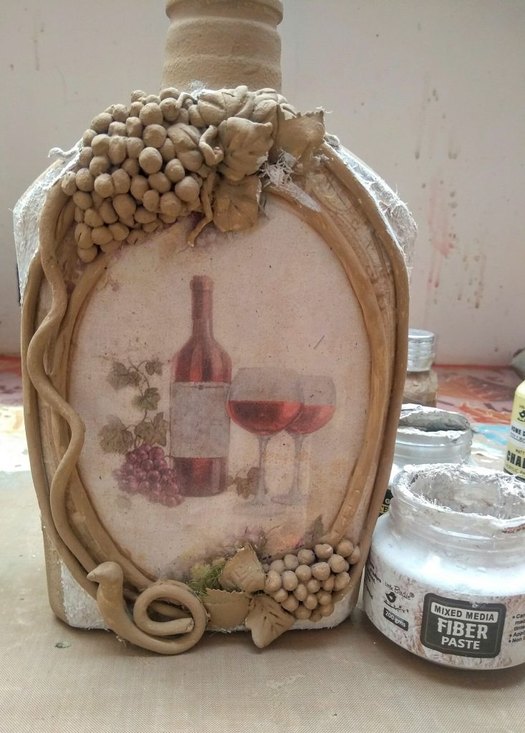
5. Next, when dry, I colored my clay work with Chalk Paint- Chocolate Truffle.
6. How can I forget to add texture in my project?? I have used Fiber Texture Paste in the vacant space in the corners.
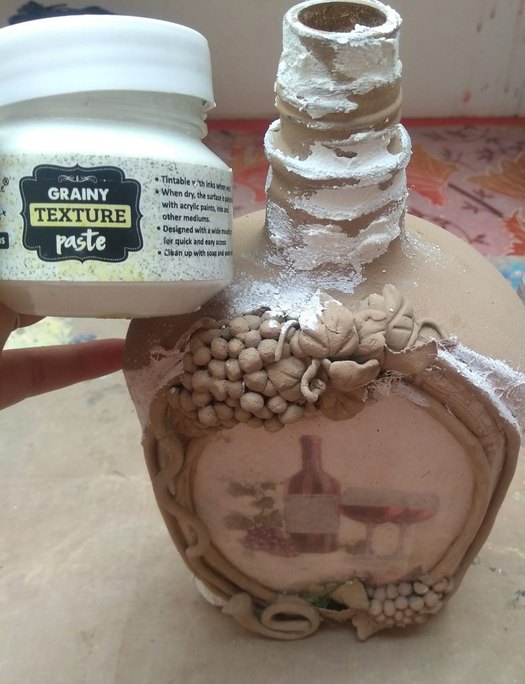
7. Added some more texture with Grainy Texture Paste randomly on the neck of the bottle.
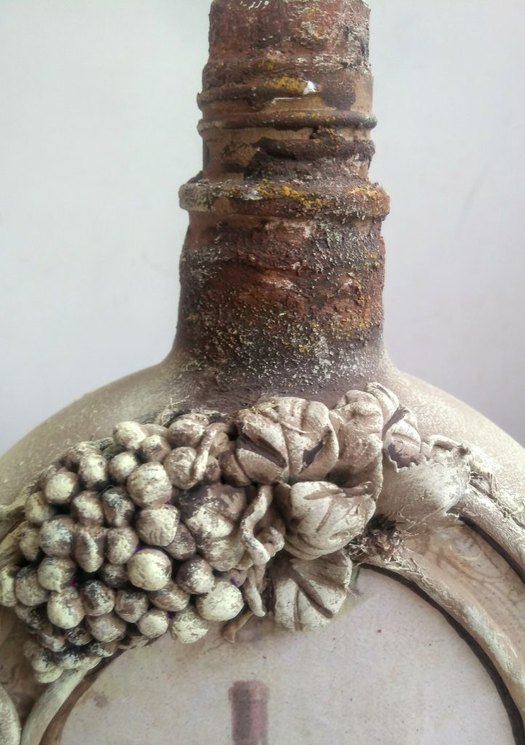
8. I painted all the texture work with dark brown color first then created a rusty look with shade of orange and yellow acrylics. Also did some dry brush shading with Fortune Cookie shade of Little Birdie Chalk Paint all over the bottle.
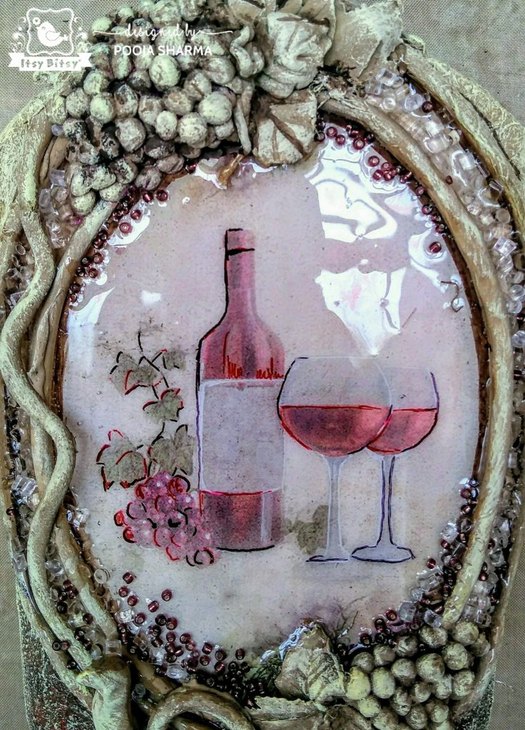
 As you can see, it was looking already so beautiful but I wanted to try out something more, I used black, red, white permanent pen to highlight the design.
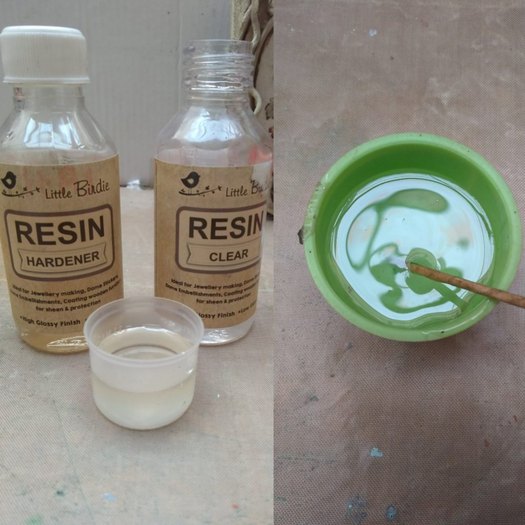
I hadn’t used Little Birdie resin before so I decided to use and try this product in this project of mine.
9. Resin comes in 2 bottles; clear resin and hardener. Mixed both liquids in 1:1 ratio and stirred them well with a wooden stick.
 10. Started pouring resin on my main design and also between the clay boundary, trying to avoid bubbles. I added Crystal Drops and some small beads (brown) and let it dry for about one hour.
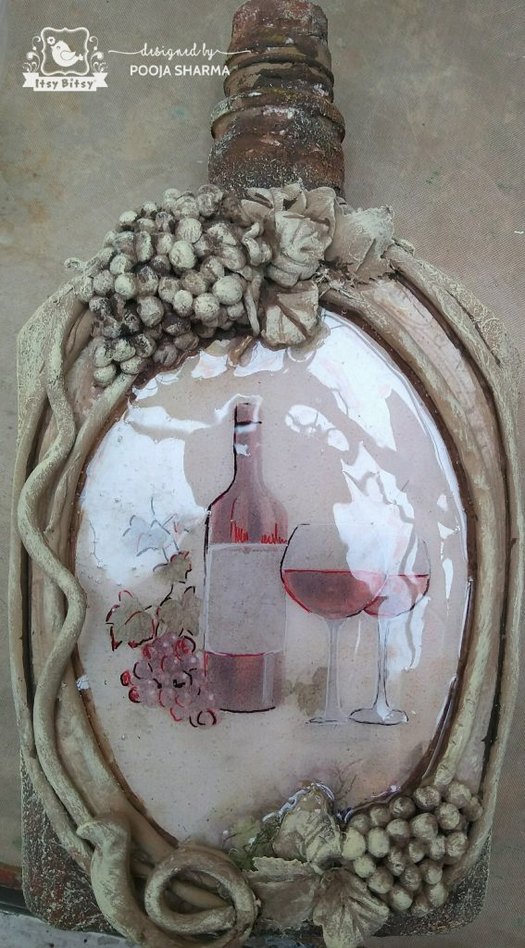
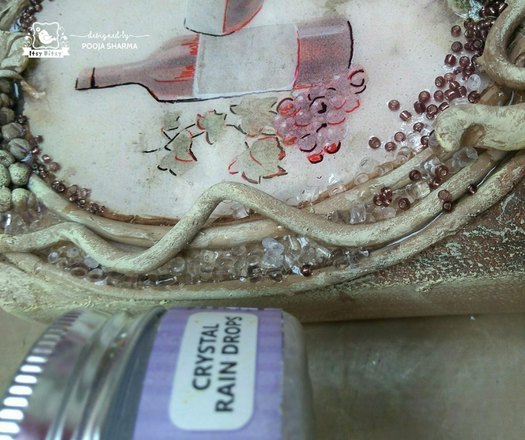
Note :- Never use resin directly on paper. Always apply decoupage glue before using resin.
In the end, I colored the Crystal Drops with metallic paints.
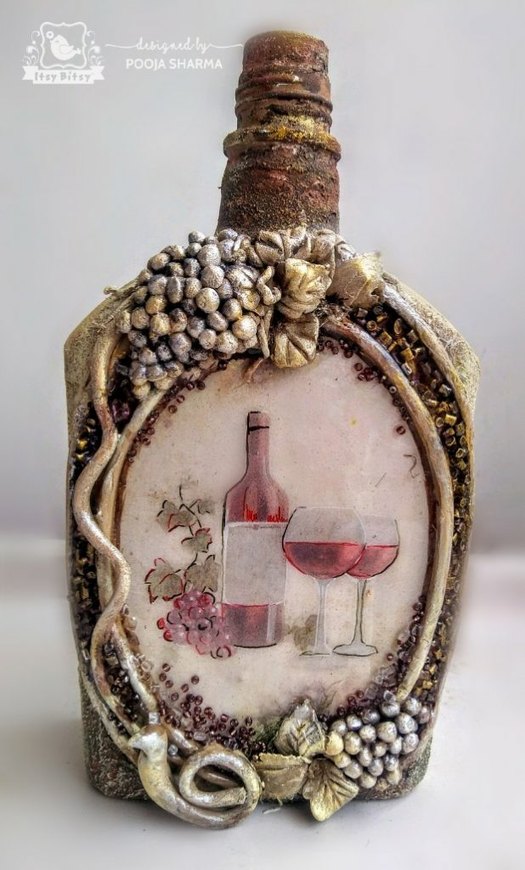
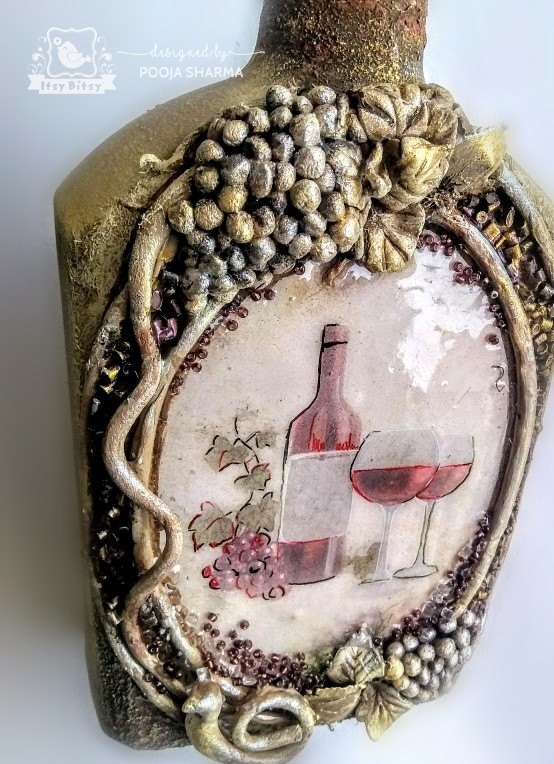
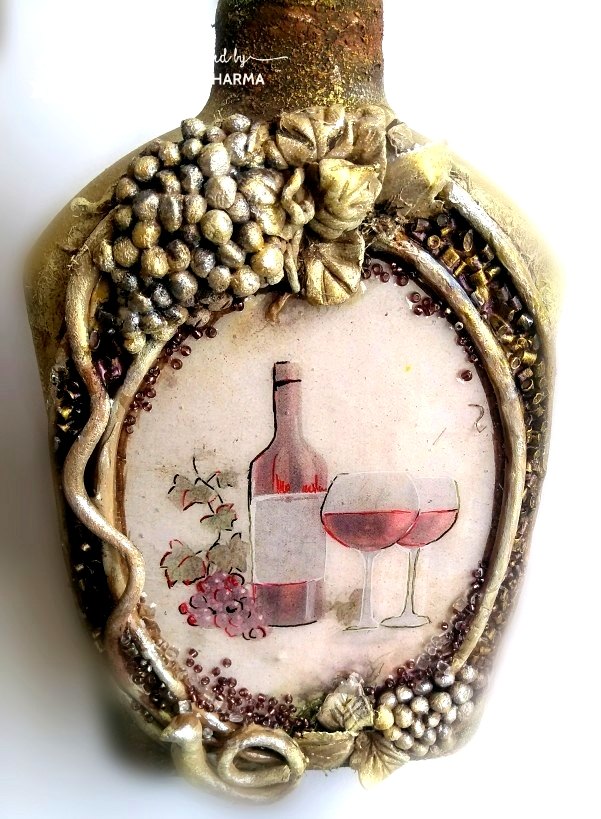
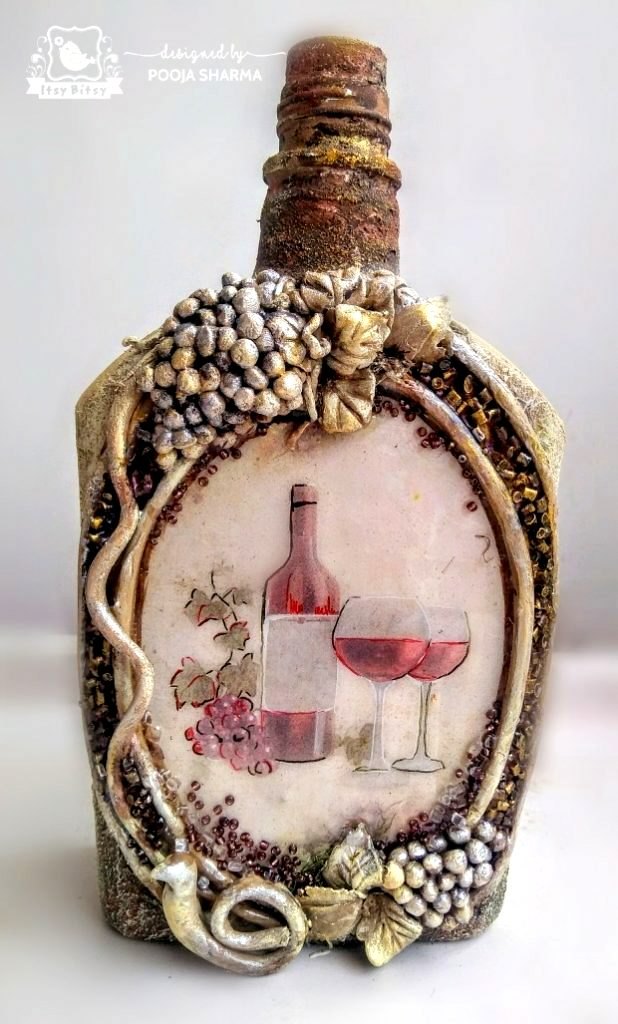
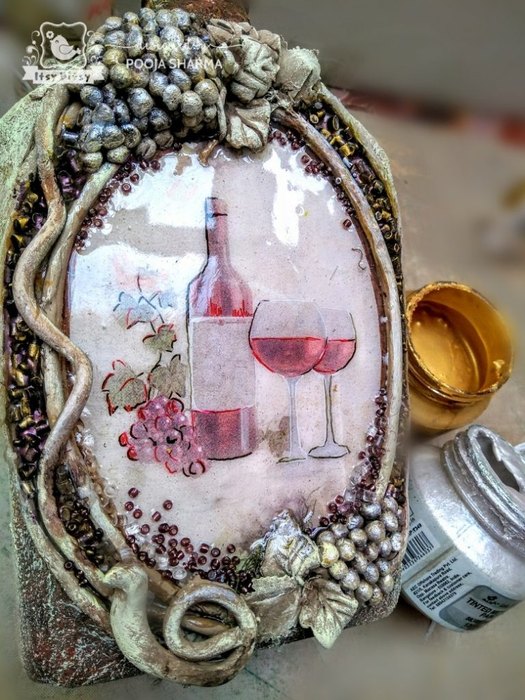 Here are some more pics of the completed project.


Hope you liked my creation!
Thanks for being here
Take care
Pooja


