Sunday, 9 October 2016

Hello guys this is me pooja once again welcome to my blog so I today I am sharing my second creation with burlap sheet thank you Itsy bitsy to introduce me with this multi purpose use sheet so here is what I have made have a look
I love it because it's simplicity what in same time Beautiful to 
Here is material I have uesd 
Burlap sheet,laces,diecut for side boards,chipboard,golen outlined,glue gun,n some handmade flowers which i paste on chipboard in last some golden ribbon 
Is very easy to make I have one pic of making I hope it will enough to make u understand it's making progress


So here is complete pics of this 


Thank you so much for visiting I will be happy to know about ur views about my creation 

Friday, 7 October 2016

Little gift box

Hello n thanks for visiting my blog
I was very busy in some previous day's but now I am back with something new for u guys
As u know festival season in coming so I decided to make something related to this for this I have uesd burlap sheet which I got as a gift from one of best online craft supplies store Itsy Bitsy
When I got this, lots of ideas were roaming around in my mind what when I realised that this sheet is water proof so I decided to make something creative as well as durable n useful too so I decided to make these beautifully gorgeous envelope n little gift box
In my first part I am posting my beautiful little gift box it has multiple use
Material used :- burlap sheet,lace,golen outlier,flowers for                                               decoration,bigsizePearl,mirrorring,decopafe napkin

  1. First of all take a sheet 4/4.5" burlap sheet cut it out then join the line with glue gun after that I have done decopatch work to hide the joint n paste lace with glue gun on the round edges 
Cut 2 piece round shape to cover both the ends n paste one round shape piece to cover bottom n other one should b open as flap so that I attached it with lace pic after that I cover the edge with golden lace u can see in pics
3.in last decorations part I have some flowers of zari ribbons so I have used these u can used ur own taste decorations material its all about different creative mind's
4.at the top opening flap I used mirror ring
Here are some more pics 


Monday, 29 August 2016

Altered box


Hello folks today I am going to share my one more alter work this is on a waste empty box this time I wants some shine n antique look

To make this first of all done some stencil work with moulding paste
Then I cut some corrugated sheet in small piece randomly and one another piece in shape of little similar to Street light hanger u can see in below pic

After that I paste all embellishments where I wanted to paste, most of emblisments I have in my house as waste but I think in this whole world nothing is waste so I put my beads, shell,some mirror rings ,some stone some washers Metal ring n some metal charms n lace on my box as embellishments,one more thing I have made that is my beautiful clay flower which makes it more beautiful for this I have used my own home made paper mache clay 
When all got dry I applied black acrylic paint all over the box n let it dry
After that i have used some metallic colors 
Iike bronze,green,deep red n golden

Here are some pics of my creation


I hope u like my work 
Thank you for visiting my blog I will be happy if u share ur view n love as comment below 
link my this post to 


Saturday, 27 August 2016

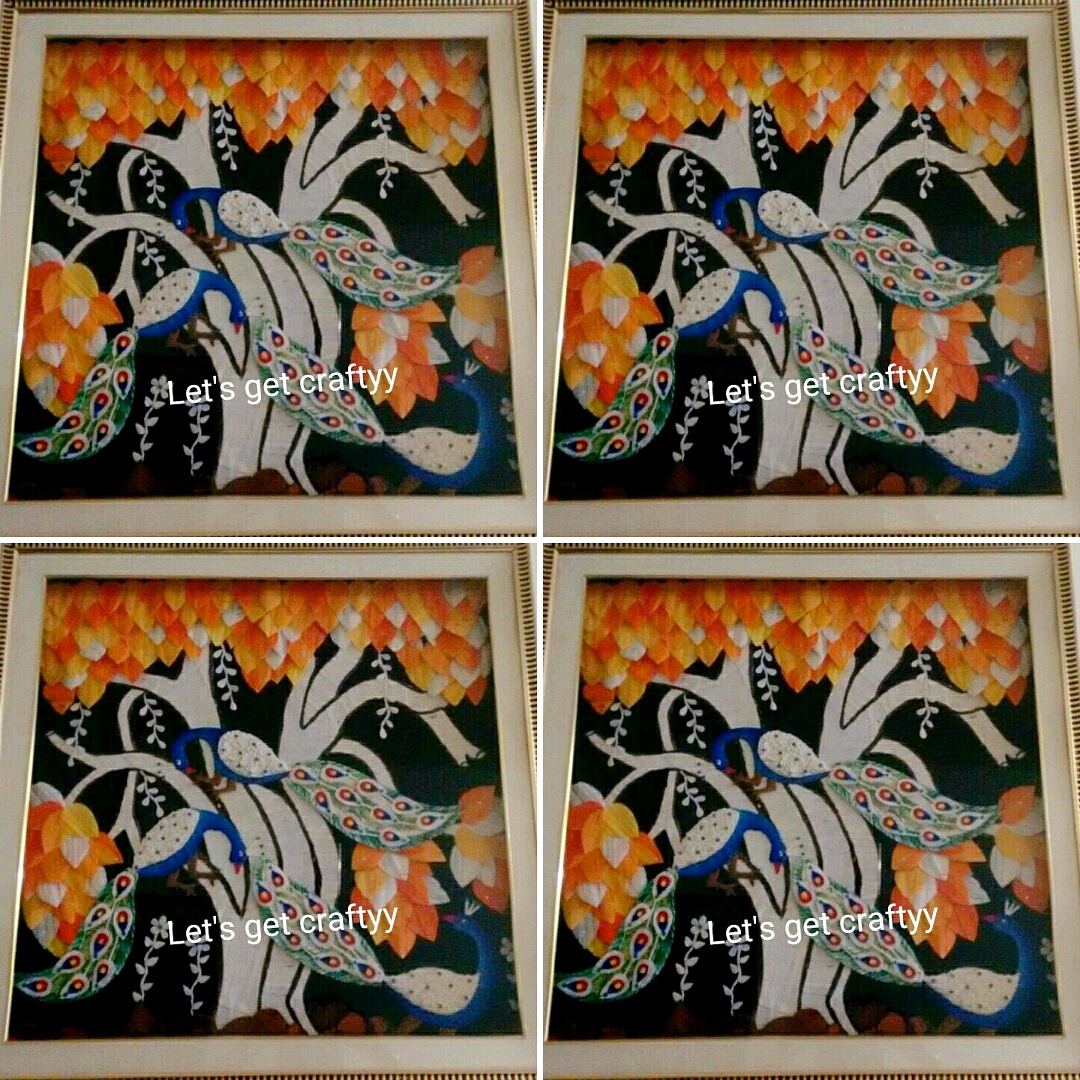
Sholawood painting

Hello everyone
I am pooja again come with some of my work this time little different as I mentioned I loved to do different art foam in various ways n material too
This time I am sharing my sholawood painting which I have made year ago  what it's still looking beautiful so i decided to share this with you
So here is the pic of my creation


Material :-cardboard,sholawood roll,wood or mdf for base, acrylic color,stone,black fabric
First of all I paste fabric on board with glue
After that cut card board for design like trees, peacock r firstly cut on card board after that I have pasted sholawood on it to give is little volume
But one should careful about the direction of the wood it should b in vertical for all shape
After that I have pasted all cut out in proper place of design with glue
When all has done I have coloured all the design with acrylic color except some sections because I wants to remain some parts with the original colour of wood
And in the last I paste some stone for shine


I hope u liked it


Please comment below n show some love towards my work thanks

Tuesday, 23 August 2016

Mix Media

Hello friends mix media is a art foam in which includes more then 2 medium
and i think mix media is a art foam where we can put all our imagination in one 
Art piece we can do lots of things in this art I loved to do mix media n believe 
Me u need not many  branded products for something when u really filled with 
Imaginative thoughts 
So first of all sorry I don't have my incomplete work pics of my this work because 
This is my little old work n that time of point I don't have idea that I will create my bolg 
So soon 😀
But I will try my best to explain u so here is my creation pic


 Isn't it's beautiful I have made this most of the things which i have in my house as not useful things like shell,some stone etc

So here is material which I have used for this
Round mdf or wood piece whatever u have
Some decoration things like shell,beads,piece of fabric,some small stones,net piece,lace,paper cutting,some shining stone,small beads

Making progress
Paste a canvas sheet or a thick fabric on board

after that apply some gesso I have used my homemade gesso let it dry

after that I have used a plastic container empty round box lid n placed it in little center out to give it a little hight I have used double side tape,after that cut a thick sheet which is in round shape but little big form that lid I cut this sheet from the centre to make a board of that lid,i also sketches some leaf on the out side of the sheet circle please have a look in below pic the centre part
After that stick a paper in the centre part of that lid circle n placed a hand cutting tree pal layered heart shape I have used my love stamp with red ink on the heart shape n covered the corner of the inner circle with the blue thin lace

After that its time for some stencil work I have used local market stencil for this,after this I added some paper cut stripes n placed at the top of the circle n some in the right side n some r in the leaf side paper stripes should b uneven

After that its time for emblisments please have a look on above pic how I assembled shall,beads,stone,lace, aluminium net,plactic net, sentiments,n flowers

Flowers r also handmade I have used normal craft paper for Making flowers no card strock
In my coming post I will try to post some flowers making progress

Now is time for colors I have used water color inks for this n some places I have used acrylic color,n some dusty color colors u can choose of ur choice                                

So here is some more pics of my complete  work                        
 I hope u would like to see some more pics


I have link this for a challenge

Thank you so much for visiting please leave some comments n show ur love towards my work

Monday, 22 August 2016

Altered a waste box

Hello friends
today i am sharing my new work called Altered box u can see that box blow which i have  altered my this work is inspired from a artist YouTube video I don't remember her name but I will try to find her name n will add, but I have put my own touch in this many things I have add by my own so let's get started
firstly i have covered whole box with massing tape to make it little strong 


as u can see in above pic i have taped it all after that i covered all the box with one pink fabric which is again waste for me with the help of normal school glue,i have left some extra fabric both sides (top,bottom) at the opi cut the fabric from the center n flod one side cut in to shape of rose flower done same for the other side cut so i got 2 rose flowers at the top
for bottom i have done same cut n make a bow with fabric

note:- fabric should b wet with glue while doing this
i have add some mustered seed,beads,some dry steams,n congregated sheet as embellishment
u can see pic blow of this

now its time for coloring i have use acrylic color for this first i have applied black color all over it after its dry i apply blue color on flowers n green for leaves with dry brush Technic add some pearl colors for shine
in the last apply little gesso for highlight
so here is complete look of my wok have a look
i hope u enjoy n like it


thank you so much for visit my blog
  

Saturday, 20 August 2016

Friendship day card

Hello 
Today i am posting my new post friendship hand made card 
to make this card I have used Card strock paper as a base
I started with stencil work with Moulding paste 
Stencil I have used honey bee 


After that I have done color background with water color pink ,green tone then I have done my Stamping with red Ink
I have made this beautiful Flowers without die cut machine I cut out orchid flower shape on card stock paper n made these flowers n coloured them after dry i have used Diamond dust for shine
i have used a lace pic as a symbol of friendship band


So here is complete look of my card